June 22, 2014

Misadventures in Shawls, Part 3: The Pitfalls of Combined Knitting and Stitch Markers

I have to say, despite my semi-laziness in devoting time to working on this, I've gotten pretty far.  Things are speeding up a bit, as I'm well into the part where there's a lot of decreasing going on:

On row 81 yay.

When you hit chart C and beyond, though, it may lose stitches but it gets way more fiddly for a good section of it.   Unfortunately, my tension during that part was shot to hell, and there are stitches and yarn-overs that are small, and others that are huge.

Also, I have two running problems with my stitches at the moment:

1) The markers denoting the repeats are after a purl stitch, which means my purl stitch there is waaaay to loose, as it's eating the slack going around the stitch marker (this is not the first time I've had this problem, but I haven't figured out how to correct it yet other than taking out the stitch marker, which isn't an option here):

This is the back of the work, if you're wondering.

2)   My usual knitting style is a combined style. For me and many combined knitters, this means I knit 'normally', where I twist my yarn around the needle so the right leg is facing the knitter, but I purl in a manner that results in the right leg facing away from the knitter (I've talked about this before).  There turns out there's one issue with that.  When you yarn-over counter-clockwise after or before a stitch that was knitted or purled clockwise, the yarn-over pulls the other stitch down, and makes it really hard to find the right leg of either one.

It took me more than a few rows to realize why my stitches looked screwed up, or where my 'missing' yarn-overs went.  There is several places in the shawl where I knitted the stitch wrongly by working the wrong stitch or side of the stitch.  Luckily, since this always happens near a yarn-over, it just looks a bit messy and the yarn-over is a bit smaller or bigger than normal. I might have ripped it all out when I realized I had been reading those stitches wrong, but I don't have the patience or time for that at the moment.

So, how do you read this mess to work it correctly?

If you have a stitch with the right leg out before a yarn-over, you'll usually see it as this:

Ignore my lovely pajama pants; it might have been around midnight when I took these

The first stitch you need to work is not that string that looks like a loop below the weird twist (that's the stitch below your last one), it's the outer loop tilted away from you here:

Green arrow, not the red

There's the right leg...


So just work that loop as instructed:


Once you drop the stitch, you should be able to see the yarn over much better: 


Work it as instructed, and then you're done with that.


On the other hand...

If you have a stitch with the right leg out after the yarn-over, it'll look like this:

The difference to the set above is that the first stitch you see there is longer and usually angled more to the left, and the twist where the two stitches meet is more towards the knitter (this is because the YO is pulling it down towards the knitter, vs above where it was pulling it away).  Also helps to know where you are in the pattern.

The yarn-over is actually the yarn bar slightly below the needle towards the knitter:


Use that loop to work as instructed:


Once you slip the yarn-over off, then the other stitch will look like a normal stitch (for combined knitters at least).  Work that as instructed.

And that's it.  Now, if there were some easy way to correct those darn huge purl stitches.

June 19, 2014

Tappan Zee Tank

Yes, I actually have another pattern completed.  I've been working on this on and off for the past year, mostly under the radar.  There's a couple of reasons for that.  One, it's a garment, which is by nature bit more complex.  Two, while it's not a super complicated pattern, it's not a beginner's pattern either.  Three, I corrected my design process, went through a few ideas until I found one that worked with the yarn, and then actually sat down and most everything correctly, including hiring a tech editor.  The last is that I did this on top of everything else I do.

Much of this is also related to the fact that the other thing I decided along the way was that I'd put enough effort into this pattern to warrant selling it.

Anyway, all that is done and I'm proud to say, here you go!  My first for sale pattern.

Tappan Zee Tank

Pictures copyright Samantha Thomaier

I named this tank after the Tappan Zee Bridge because, not only was it the second plan of another bridge-named tank, but also the tank's diagonal line design mimics the strong diagonal lines that make up its superstructure. 

The pattern is for sale only on Ravelry, and is as of now priced at $5.00 (US).  Click here for the Ravelry page, or click the following button to purchase: 
 

Craft Type


Knitting

Skill Level


Intermediate level, as it involves standard increases and decreases, shaping, basic crochet, and following multiple directions at the same time (including a element that occurs at different rates). 

Sizing


32” (34”, 36”, 38”, 40”, 42”, 44”, 46”)
[81.3 (86.4, 91.4, 96.5, 101.6, 106.7, 111.8, 116.8) cm]

Gauge


20 stitches x 30 rows per 4” [10cm]

Yarn and Yardage


Valley Yarns Goshen (Worsted weight, 92 yds/skein, 48% Cotton, 46% Modal, 6% Silk):
3 (4, 4, 4, 4, 5, 5, 5) skeins for color A
3 (3, 3, 4, 4, 4, 4, 4) skeins for color B

Needles and Hooks


US 5 [3.75mm] 24” circular needle
US G [4 mm] crochet hook


Happy knitting!

_________
Ug, code generators.  The markup's a bit messed up.  Think I fixed it but if it looks wacky in your browser, I'm sorry.  I'll clean it up at a later date.

June 3, 2014

Oops, I Did It Again

Since I can't really do the shawl anywhere but at home, I've been knitting a sock for my subway project:


'bout time I used the wound-up skein that's been sitting on my coffee table for at least 6 months
It's not a bad pattern, and I love the design and the yarn.  Might have had to rip it out twice due to issues, but none of that was the pattern's fault (first time I screwed up the chart, the second I realized I had to make it a bit smaller to fit...well, ok, one size fits all isn't for socks, so that may be the pattern's fault). This is my first time doing toe up socks, and therefore the style of heel involved is completely new to me:


I'm not a fan of being blind to the pattern, but having got past the heel now, it seems like it'll work out, and at least now I understand how this heel works.  Well, I'm ok mainly because according to the swatch, this yarn will grow a bit so being slightly small for my foot is a good thing.  But I'll take it.

However, that's not what I'm hear to talk about.

I'm here to talk about another needle.  My brand new Knitter's Pride Karbonz circulars, size 0 since I tend to do a lot of socks on 0s.  I bought them a bit less than a month ago when my knit group made their what's turning out to be annual trip to WEBS.  I was being splurge-y, and since I tried out the Karbonz at VOGUEknitting Live, I've wanted to get one.  So I did.

I like them.  As someone who favors metal needles, I still liked them.  They're not as slick as other metals, but still slick enough for my comfort without feeling like I fighting it too much, yet not so slick it feels like you're slightly out of control. They feel solid, but not heavy.  It's an interesting sensation, and I find them very usable.

So when I had to rip out my sock the first time, I switched to my new needles as was happy.  Until today.  Because I broke them:


Oh, they don't seem broken, unlike the last needle I broke (also on a sock, of course).  But they are broke.  You see in that picture up there that the tips aren't the carbon material but are metal?  Sepreate pieces of course. So, I was knitting along on the subway into work today, only to have one of those tips dislodge just enough so that it wiggles back and forth with the slightest of pressure.  Including trying to pull a stitch back with it, because of course it was the side I was holding in my right hand. I managed to complete the row very carefully, then I put them away because I was afraid any more knitting would cause that tip to come off completely and anyway, it's not easy to knit with a tip that bends when put under the slightest of pressure.

Am I really that hard on my needles?  I mean, I'll entertain that thought because I know I'm a tighter, rougher knitter...it's why I prefer metal needles for most yarn.  Or just unlucky and got needle with an issue?

Anyway, there is a happy ending to this story.  I emailed WEBS and asked if they had a broken needle return-and-replace policy, because I couldn't find it on their site and, I mean, it's only been a month.  I was fully prepared to pay the shipping to send it back and have them send me a new one because it's still cheaper that way AND I won't have to deal with the switching needle gauge problem (because I do have a metal size 0 circular for socks here already).  They replied that they have a no-questions asked replacement policy on Knitter's Pride needles, and that they would send me a replacement right away.

Hopefully I don't break this one.  The only suck-y part right now is that I don't have a travel project to work on.  Unless I just finish this first sock with the metal needles.  How much could my gauge change for the upper part of a sock with a crazy design, anyway?

May 30, 2014

Misadventures in Shawls, Part 2: Well This isn't So Bad But it is a Snail

Now being a little more of a month into this shawl (I am including last week in that count, despite the fact that I made no progress on the shawl at all since I had to make garb instead), it's not as bad as I feared, though it is as slow as I've feared:


Up to row 43, woot!  Though there's a lot more beads on this shawl than it looks; flash washed them out.

This pattern has two things going for it: it's not that complicated (the pattern's written and charted well to boot) and it's pretty repetitive.  At least so far.  Beading turns out to be easy as well; you just slide the bead onto a small crochet hook and then slide it onto the desired stitch.  However, 20 repeats of lace with beads still eats time, especially at the bottom there where you had to place 2 or 3 beads a repeat for every right side row.  I guess the other good thing I got going for it is that the stitch count is decreasing (you start at the bottom of the shawl).

I decided to alternate between the blue square beads (for which I ran out of rather quickly and had to go find the store I bought them from to buy four more boxes.  They went fast) and the iridescent silvery round beads that I bought last. The result is not something I love 100%, but it doesn't look bad:

Way less yellow colored; more silvery with color accents, but you get the picture.

But this is where I have to remember that it's not for me.  I don't like that the beads that stand out so much and don't quite match, but my sister's a eclectic person who loves shiny things.  In one of my self-doubt moments I texted her a picture (better colored than this one) asking how she liked it and her answer was 'pretty!'.  So I'm on the right track.  I do have to say it's kind of grown on me at this point, though I still would have picked darker beads.

Some notes about this pattern so far:
  • The cast on for this shawl is rather interesting and I don't know if it comes from somewhere but I've never seen it before.  It involves creating a crochet chain that at certain chain counts, you YO over the knitting needle to create a stitch.  Row one is knitted using the YOs, with the chains hanging off like decorative eyelets:
After the CO is done

What it looks like on the shawl

          I'm sure it'll look better when it's blocked out.  And if I had a clearer picture.
  • As I stated, pattern makes perfect sense so far.
  • This is a simpler motif than my last lace shawl.  Maybe it's because I have more experience under my belt that it seems like that to me, but I'm thinking this is easier.  The last shawl I did I couldn't figure out the pattern for my life, but it was wall-to-wall lace with cables.  This has more stockinette dead space in it.  It's a lot easier to see where the lace will be going, and therefore I'm not glued to the chart. 
  • Which means I'm most likely faster than I was last time, but knitting 400 and something stitches of lace weight still takes 30-50 minutes for a RS and WS row.
  • However, I haven't had to rip it out to a lifeline yet (note: the green-white stripes in the shawl in all the pictures...that's a lifeline.  They get removed).  I have had to hack fixes for a couple of mistakes, but at least I can do that in this pattern.  The worst mistake so far was when I decreased one off of the center stitch of one of the repeats and didn't notice until the next RS row.  I managed to drop a stitch down one side and ladder a new one up on the other side to fix the stitch count, and keep going as is.  It's noticeable if you look hard enough, but the other beauty of lace weight is that each stitch is but a small dot in a sea of stitches; one being off isn't too obvious when looked at as a whole.
  • The crappy part about lace weight yarn is that it's soooo thin and loves to tangle in everything.  It took me a day to wind the damn thing because it didn't quite fit on my swift and managed to tangle up in itself.  It could have been worse, but I now have three separate balls from one skein because there was a couple of times I had to cut the current ball off and start another to get rid of a knot that developed.
But all in all...it's going.  Almost done with chart B; we'll see what holds up on the next chart.

April 22, 2014

Misadventures in Shawls, Part 1: Looking for Yarn in All the Wrong Places

So, among all the many things I've been doing recently, I've planned out and have started a lace shawl.

A couple of noteworthy things about this:
  • This is only the third shawl I've ever knitted (in the about 4 years I've been knitting), and the first one was all garter stitch so it doesn't count
  • This is only the second large lace project I've ever knitted
  • This is my first project with beads
  • I made the last lace shawl over two years ago, and it took me six months to complete it
  • The shawl is for my sister.  For her wedding.  In August.  Which gives me four months to do it.
It's not that I've been procrastinating.  The first problem was that the planning part took a couple of months.  The reason it took so much time wasn't the time spent looking for the perfect pattern (I found that rather quickly), or even getting my sister to tell me what she wanted (though that took some effort).  It was finding the yarn.

You see, when you agree to attempt to first match the dress (which is a slightly off-white color), its bad.  Luckily the bride-to-be then stated the preference of having the shawl match the bridesmaids dresses, which were described to me as 'similar to this dark royal blue dress I'm wearing' (which, if you've read my blog, you'll know is my favorite color).  For which I was very happy because finding that color yarn shouldn't be hard, right?  I buy it all the time.

A couple of things about that:
  • The color of the bridesmaids dress wasn't quite that dark royal blue I love, it was a medium blue that loves to change colors in different lighting (thank you to the people who suggested I could buy a swatch instead of trying to judge it on the computer screen.  That seriously didn't occur to me)
  • Any blue color around it loves to change colors in different lighting...including on a computer screen
  • The amount of lace weight yarn I would consider 'wedding worthy' (read: has a good silk content and/or is smooth and shiny) contains a lot less variety than you'd think
  • That color is hard to find in nice lace weight yarn 
This resulted in several things happening:
  • Having to send back $70 dollars worth of yarn because I jumped the gun and bought it without seeing the dress at all (including computer), and it wasn't the right color (didn't help that the picture made it look darker as well).  Which somehow went the way of Alaska to get back to the west coast, just making it there by the return deadline.  Good old USPS.
  • Having to send back another skein of yarn because it was a completely different color blue than it looked in the photo
  • Running to one yarn store and finding nothing
  • Running to another yarn store and coming back with a 100% wool, single-ply skein that nevertheless was at least close to the right color
  • Running to a third yarn store and ending up with a nice 100% silk yarn that was a variegated...dark navy blue
  • Running to a fourth yarn store and after not finding anything there yarn-wise, bought needles that I thought I'd need (turns out I had to go up a size for gauge, so no dice there either) Oh, did I mention that I don't live anywhere near a yarn store, so running involves more than one subway/bus?
  • Realizing that I had bought the same brand of yarn the last two times, and if I could find the 100% yarn in the wool yarn's colorway, I'd be golden
  • Finding said colorway in the silk yarn online (yes!)
  • Getting it a week later to find out that...it may be the same colorway, but they were not the same color (but it's close enough to the dress so screw it)
  • Went looking for beads, and when I couldn't find some that matched the yarn, bought a bunch of cordinated ones
  • One, and my favorite of the bunch, of which didn't fit my smallest crochet hook, so I went to a craft store when up at my parents' house to get a smaller one...which was also too big
  •  Going and after checking a sewing supply store for the hook (of which, despite the type of store, they carried a lot of, just not smaller than what I already owned), buying more beads that were similar and bigger than the ones I bought...only to find a smaller crochet hook in a beading store
So yeah, it took me some time.

Here's the two skeins of yarn I got at the local yarn stores:

I really like the dark blue color one, but it doesn't work for this shawl

 And here's the yarn on the left with it's 100% silk, same colorway counterpart:

Yes, that is the same colorway, I swear.  Madelinetosh's Lapis colorway in Prairie (L) and Pure Silk Lace (R)
I don't think I need to tell you that nothing pictured here looks exactly like the color in the photos.  The bottom one is closer to true color, though.

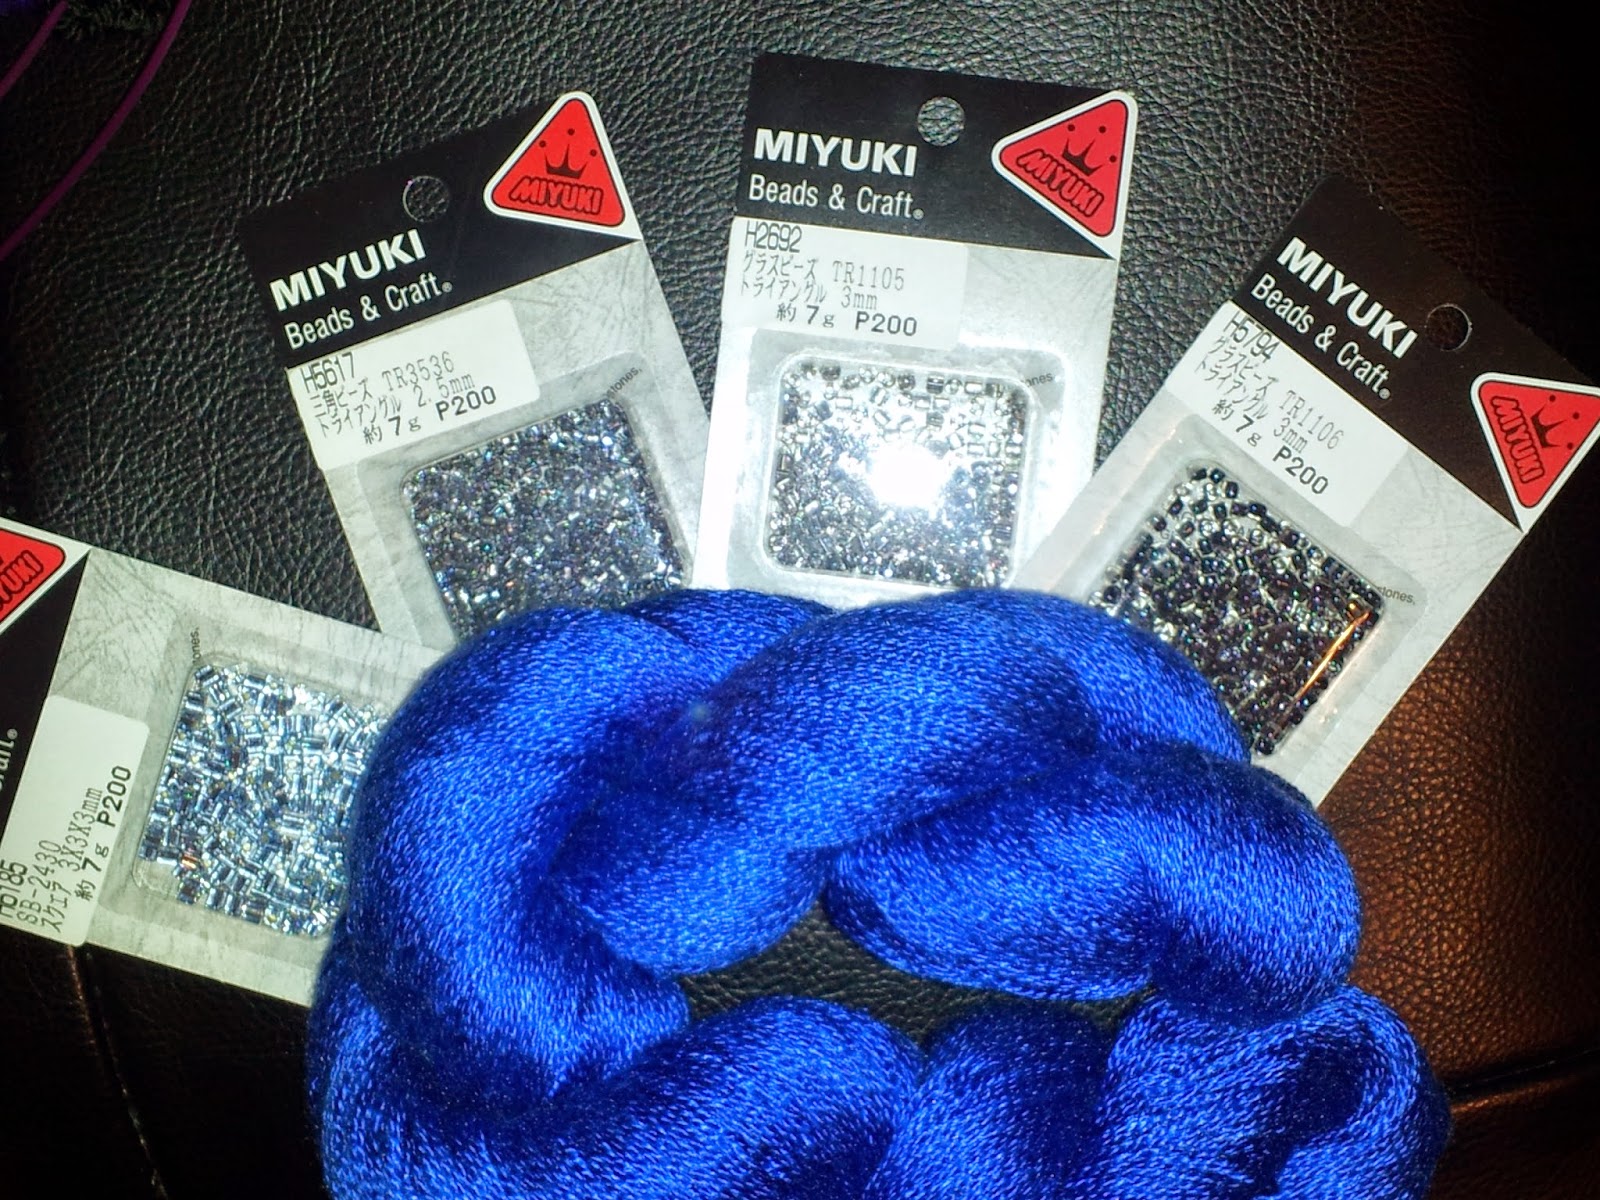
Oh, and some beads:


My sister ended up liking the ones on the far left, though I liked the ones right next to it (those are the evil smaller beads).  I've started using the far left ones, and also these:


Which is kind of a blend between the ones I liked and the ones she liked.  I dunno if I'll still use the other ones.

And this is only the beginning.  The fun didn't end there, but I'll save it for another post.  I better go work on the shawl now (or, more realistically, I'll do a couple of pattern repeats and then go play Skyrim.  Because nothing beats a deadline like procrastination).

March 1, 2014

In Other News, I'm Still Here

So I am a lazy bum who just got out of obsessively watching the Olympics for over two weeks and realized that I haven't written a blog post in over a month.  However, this lazy bum also has been spending half her free time studying for the GRE, and the other half trying to keep up with social obligations, projects, and the fact that she really needs to keep her apartment a little cleaner since a roach decided to chase her out of the kitchen yesterday (I'm no where near a slob and the kitchen wasn't insanely dirty either, but I had been keeping dishes in the sink overnight.  Not that you could ever get a kitchen to a level of cleanness that completely stops them from coming in, over, whatever.  I also have a roach phobia so...yeah).

Anyway, I did get my cardigan done, finally:


Of course, this was after I ripped out the collar three times on top of all the stupid little mistakes I make while knitting.  My swatch lied, or otherwise I was blinded with my love of this yarn, this pattern, or both, because when I blocked it the thing grew.  Not massively, but enough that it felt like it was just hanging on my shoulders, with a huge neckline and floppy collar.  Also, I spaced the buttons out too far and they were gaping.  After throwing it into a corner and sleeping on it so I didn't rip the whole thing out in spite, I ripped out the collar and button band.  I then ripped out three rows of the back before realizing that that section was the only one with live stitches and now I had to pick them back up (which didn't work 100% -- there was an unexplainable gap where the extra yarn hung out at the end of the live stitches and the start of the bind-off -- but I was able to hack it enough and the collar hid it anyway).  Once I fixed that, I decided to go down several needle sizes and re-knit it with new yarn (well, that wasn't a choice because I murdered the yarn when I ripped it out).  Along the way I decided to put one more button and less spaced out, and put less decreases in the collar.  The first thing worked (though I did bind off a bit too tightly), the second thing didn't.  Collar was now too small.  So I ripped that part out again, added more decreases and knitted over the short rows a bit more so the fronts were bigger.  That produced a do-able collar, though I had to sew it down to keep it folded.

I'm still not completely happy with it; it really needs a tighter gauge (damn worsted weight acting like a DK), one button band is slightly tighter than the other, and the collar isn't exactly what I would like...but it does fit more or less now and is extremely warm.  Oh well.  Shit happens.

I probably should do a proper debrief, but right now it's 11pm and I'm tired, so I'm off to bed instead.


January 25, 2014

It's Another Vogue Knitting Live Debrief


By now I think you know I always go to Vogue Knitting Live NYC.  This year was no exception.  However, unlike at Rhinebeck I had a slightly different experience this year, so here's the debrief


You can't see it very well but there are tacks on Australia, Africa, and South America.  Someone in my class was from Vienna.  It's amazing how far people will travel to these things.
In General
The one thing that was consistent from last year was the overall feel of the event.  It was the same big, diverse, more fashion oriented but otherwise Rhinebeck-esq event it was last year.  I have no problem with this, so this was fine.  However, there were a couple of minor changes that I didn't like that made my experience a little less enjoyable than last year.  Next year I really  need to get the guide on Friday like someone in my knitting group did.  If I had I would have showed up earlier on Saturday.  I'll get to these in the relevant sections.

Like last year, I met up with my knitting group on Saturday and then went back on Sunday on my own.  Unlike last year I took a class instead of a lecture and didn't get to see as much of the free stuff.

The Lecture Class
At one point late last year a coupon came out for half-off Sunday classes at this event (the benefit of attending more than one year in a row is I get all the emails about the events).  Since that subsequently made attending a Sunday class close to the same price as the lecture package, I decided to go for it.  Sunday's my better day to do stuff like this anyway.  So I signed up for Designing with Cables taught by Carla Scott.

How can I say this nicely...the class sucked.  Ok, that wasn't nice.  But while the instructor was very friendly and seemed knowledgeable, she got distracted easily and let random questions completely derail the class.  Subsequently, very little got taught.  We covered gauge a bit and started talking about schematics, and then the class got so derailed nothing else on actually designing with cables were ever covered.  Even the random chatter faded out to the instructor chatting with a few of the students, and most of the class left thirty minutes early, including me.

This is not the way to run a class.  I get that instructor wanted the students to feel free to ask questions and she wanted to cover topics some of the students wanted to hear about, even if they didn't have much to do with the course.  But you can't let that prevent covering what the class was supposed to cover.  Actually, I'm not so sure where the class was going.  All I know is the few things that were actually officially taught I knew, and we never got to anything beyond that.  Conversations about, say, copyright and where we live and what x designer did are all great, except when that's all that happens.  I paid $42 dollars to learn nothing (well, ok, that was with the entry fee).  I could have paid $85, so I'm glad at least I didn't do that.

If I didn't know better, this would turn me off from taking another class here.  Luckily, I know enough people who have taken classes at this event and loved them, so it just means I'm going to be a lot more picky if I end up taking a class next year.

Fashion Shows and the Panels
Here's the other thing that sucked this year.  There were no fashion shows on Sunday.  You see, on Saturday I'm busy hanging out with my knitting group, and so I don't get to see any of the shows and panels.  I come back on Sunday mainly to do that.  Except most of everything was on Saturday this year, and that was different than last year so I wasn't planning on it.

This is what I meant about picking up the guide early (or even better if they could mail that schedule with the IDs to us who pre-order, that would be awesome, but I know that's a bit much to ask for).  If I had known that all the fashion shows would be on Saturday, I may have come in early to see a couple of them.  But since I didn't know this until after I had come in to meet my knitting group, I was out of luck. 

So I saw no fashion shows.

What I did do on Sunday after my class, well other than cruse the Marketplace again, was see a panel and a free lecture (again, a lot of them were Saturday, but at least there were Sunday ones).  The panel was one of those general interest, hear people in the industry talk about their experiences, ones, but I like those.  This one was the one titled 'Men at Work', and featured all male yarn industry professionals (well, except one of them was a former Project Runway contestant instead of in the knitting/yarn industry...an odd choice, but that shows popular or something so I get the rational behind it).  It was good in the same way most of these types of panels are: voyeuristic and funny.

The free lecture I went to was on the Trends in Knitting, and while the lecture was fine, all the trends were more about what was trending in fashion and they all were ugly as sin.  However, I already knew that big, bulky sweaters and clothing that looks like it's falling apart was coming back (and skinny pants are still here.  I'm still waiting for that trend to go away so I can finally buy pants that don't make me look like crap).  One thing the city is good for is seeing the new fashion trends before many others notice because people start wearing them here sooner. But I was expecting something more geared to the knitting world in general, but it was fun in the way that the fashion shows are fun: you point and laugh at the stupidity of it.

Also, I had a short but interesting conversation with a older woman that got the lecturer to admit that most of this was looking at the teen and young adult trends.  I pointed out to her that just because one was in that age group didn't mean they liked such things, and vice versa (you know...being that I'm in that age group and tend to hate most of the trends).  We got into a conversation about how if we were going to spend all that time knitting something it better look good a year from now, and that if one looked at pattern trends on sites such as Ravelry instead of liked pictures on sites such as Pinterest, such high-fashion trends didn't show up and it was more classic, timeless stuff.

Purchases
I was bad this year and bought five skeins of yarn:


Ok, three are the same yarn.  I've been thinking about getting this colorway (Stargazing) of Madelinetosh for awhile now to do a sweater, and getting it here was an excuse to buy yarn from my old LYS (who was back again and still remembered me).

The other two are impulse buys.  The gray skein is Squishy Lace from Dragonfly Fibers.  It is very soft and squishy and Dragonfly Fibers had a lot of yarn I loved but I picked this one for some unknown reason.  I have never used Laceweight before, and I'm not really a shawl person.  Oh well, first time for everything.

The other one is sock yarn from Neighborhood Fibers, and I got it because it's such an interesting color.  Since I don't tend to get much outside of the blue/black/gray that I love, I got it.  I was looking for a color to go with some black sock yarn to maybe try some more colorwork, and this should work.  We'll see.

I also bought another Sock Rocket, so now I'm only missing one in the standard sock sizes.

Oh, and the third thing that sucked is that Soak wasn't there!  I'm all but out of the Soak I bought last year, and how perfect it was that it ran out right when VKL was going on again so I could by more and...they didn't have it.  Probably because Eucalan was one of the sponsors of the event.  I looked at the Eucalan and wasn't thrilled with the flower scent it came in (of course this is a personal preference; I'm sure some people love it and I can't speak to how it works).  I like some of Soak's scents better (I really love their Aquae scent, and Unleashed is nice as well), so now I have to go order it online today because I am officially out of it.

Conclusion
Overall, I did enjoy my time at Vogue Knitting Live.  One positive thing was the yarn selection this year was great...I was so tempted to buy more yarn than I did.  I'm just a little disappointed that it was worse than last year in the other aspects of the event...you know, the ones that make it VKL 

Well...to be fair, there was a lot of random items like this:


They were amusing and very VKL.  But other than that, I mean.

Well, there's always next year.

January 14, 2014

I Don't Think I'll Learn Though

So I'm currently knitting a sweater:


I should say, finally knitting a sweater.  It's been awhile, and I have a lot of sweater amounts of yarn in my stash.  Anyway, as you can see, I've been at it awhile, and have the main body of the sweater done.

This pattern, interestedly enough, suggests that I knit the button-band and collar before the sleeves.  I could have ignored these instructions, but I decided why the hell not (despite the fact that it also suggested working the fronts at the same time with two balls of yarn attached...not doing that again).  So I grabbed my needle and a crochet hook and started picking up stitches....until I got to the start of the V-neck and realized that I'm an idiot:


The needle cord I used to knit the rest of the sweater isn't going to be long enough to pick up all the stitches on both sides of the sweater as well as the neckline.  Damnit.  Time to rip it all out and...

Oh, wait.  I'm using interchangeable needles.  Maybe I'll just run up a longer cord with a smaller needle and switch needle heads and...


Oh crap.  Where did all my 47" cords go?


Notice a color trend here?
Where there's one.  Had to start that one recently, didn't I.  Ok, now I need to find where my other 47" cord went and...


Oh, right, I randomly bought a set of connectors ages ago.  So now I can just remove the head at the other end and attach another 40" cord and:


Problem solved.  I love interchangeable needles.


January 4, 2014

Knitting by Structure, Part 2: All About Stitches

Introduction

As I stated in my series introductory post, the first step in learning how to knit by stitch structure is actually learning what stitch structure is.  After all, you need to know what you're aiming for before you learn how to do it.

Now, this isn't going to be an in-depth look at knitted fabric and how stitches behave in it.  I'll touch upon a few high-level items there, but that's not what we're really concerned about at the moment. What the student needs to get out of this is two things:
  1. A basic understanding on how yarn becomes stitches becomes knitted fabric, and
  2. The parts of a stitch, both active and in the fabric. 
For many people, a deeper understand will come with time and practice, so if you don't quite get it, it may be helpful to continue on and re-visit once you've gotten to the point where you have needles and yarn in your hand (or have knitted a thing or two after learning this, if you're already a knitter).

Fabric and Stitches

Simply put, knitted fabric is just a series of interlocked loops called stitches. This is easier pictured than described, so here's a diagram I found on Wikipedia (click to go to source):


Now, this happens to be the knit side of a piece of stockinette fabric, but it all works similarly (though looks different) so I'll ignore that for now.  Typical hand knitted fabric is produced by holding a set of 'active' or 'live' stitches on a needle, and using another needle to pull a piece of yarn (that is as continuous as you can make it) though the active stitch, creating a new active stitch.  You then drop the old active stitch and repeat the process on the next one.  What this does is what the red line above symbolizes: creates a row of stitches that is in reality a part of a piece of yarn looped through another part of the yarn to create a fabric.  These stitches remain active until you either create a new stitch through that stitch, or you complete a process called binding off.  To get the first set of active stitches, you complete a process called casting on.  Binding off and casting on are things you'll have to learn, but they're out of scope here.  The only thing you'll need to recognize with casting on is that it'll create a series of loops that you'll treat as normal stitches.


There are two major actions in hand knitting that one uses to produce a stitch, and unfortunately they're also called stitches (you'll find that there's a lot of things call stitches in knitting.  They are not all the same thing).  The knit stitch, as shown above, is when the working yarn is pulled through from the back to the front of the active stitch.  The purl stitch, on the other hand, is when the working yarn is pulled through the front of the stitch to the back..  You might notice something here, which is basically these actions are opposite sides of the same coin.  If you perform the action of a knit stitch on one side of the fabric, the stitch is a purl on the other side.  If you purl it, its a knit stitch on the other side.

And this is pretty much the whole basis of knitting.  Everything else is variation.  For example, I mentioned that the diagram showed a piece of stockinette fabric (which is also called stockinette stitch...yeah, I know).  Here's a real-life picture of it:


 Look at the diagram and/or the picture. Can you figure out how the stitches build to create that?  Basically, stockinette is just where you perform the knit action into another knit stitch for all the stitches (or a purl into a purl stitch, if that's what's facing you).  This causes all the knit sides of the stitch to face one way and the purl sides to face the other way.

Another common fabric type is called garter stitch, and it's the opposite of stockinette in a way.  Garter is produced by knitting into a purl stitch and vice versa, which creates rows of stitches that alternate which side is facing where:


Anything more complicated fabric type than this is the same way.  It's just an action creating a stitch where the knit and purl sides face specific directions in a repeated manner that creates a specific looking fabric. And even if you get away from that statement with, say, cables or decreases or some such, you'll still be preforming the same action in the end to complete them.  You either knit, or you purl.  You may switch direction and work through different loops, work through two or more stitches (or something that isn't a stitch), swap the order of the active loops, or whatever.  You still either pull the yarn through back to front, or front to back in the end.

Actually, there is one exception here.  It's call a yarn-over.  All a yarn-over is is an active stitch you created out of thin air with the working yarn by creating a loop without pulling it through anything.  It's works the same way as any other active stitch, and has the same parts.  Don't worry about it though until you get to increases or lace. 


The Anatomy of a Stitch

Every stitch you create, whether it's a knit or purl stitch, has four specific parts.  Let's take a stitch from that diagram above, shall we?


The first two parts are that the stitch has a front and a back.  The front of the stitch is the face of the stitch facing you (no matter what side of the fabric you are on...this is important.  The front of the stitch is not always its knit side) when it is lying flat within the fabric and open.  The back, of course, is the opposite side.

The second part is what we call the legs of the stitch.  The legs are the sides of the loop:

Well that's not the best quality there....but you get the point
They are named based on the front of the stitch, that is, the right leg is the leg of the stitch to the right when you are looking at the front of the stitch.  Same for left.

When the stitch is active, one of these legs is also called the working leg.  The working leg is the leg used to orient the needle you're putting the new stitches on. This has to do with the fact that when the stitch is active (that is, it's on a needle), the stitch doesn't lay flat and there's a needle going through the stitch.


To use an active stitch, we must guide the other needle on one side of the stitch or the other due to the holding needle.  The side used is the side with the working leg (in mechanical instructions, it's usually termed in terms like 'going x to y direction through the z side of the stitch').

This sounds complicated but it's not.  The rule to identifying the front side of the stitch and the working leg is thus: The working leg of the stitch is always the one closest to the needle tip, and the front of the stitch is always the side tilting towards you.  In this format, this does not rely on stitch orientation or style or stitch type.  For the sake of working a stitch, this also holds true if the active stitch below is twisted; that is, the stitch legs are crossed and therefore the faces of the twisted stitch is flipped in relation to what was shown above.  This is because that statement isn't in relation to the stitch itself, but the knitter working the stitch.


Wait, What's Stitch Orientation Mean?

I'll cover this a bit better in the next post as it's related to knitting styles, but the stitch orientation is simply the way the active stitch is sitting on the needle.  Different styles produce different orientations, but there are two main ones in use.  The important part about stitch orientation that you need to know is this: stitch orientation is dictated by what direction you wrap the yarn around the needle before pulling it through the stitch.  That's it. 

While most mechanical knitting instructions and patterns presume a certain stitch orientation, the whole point of this is that it doesn't.  So don't worry about orientation for now.

Conclusion

So there you have it; the basics of how stitches work and how they create knitted fabric.  If you don't take anything else away from this post before moving on, remember this:
  1. Stitches are loops and they have a front and back as well as a left and right leg.
  2. Fabric is created by pulling yarn through a previously created stitch in a specific manner.
  3. These manners of creating a new stitch are called 'knit stitch' and 'purl stitch' (or knitting and purling).
  4. A knit stitch and a purl stitch are opposite sides of the same 'stitch'.
  5. Active stitches are the ones on the needle that have not had a stitch pulled through them yet.
  6. On an active stitch, one of these legs is called the working leg.  It is used to guide the other needle.
  7. Stitch anatomy for all future instructions is based on the knitter's perspective, not the stitch's or fabric's.
  8. The working leg of an active stitch is always the one closer to the needle tip and the front is always tilted towards the knitter.
  9. Orientation is dictated by the direction you wrap your yarn to create a stitch.
Don't worry if it doesn't make complete sense now, especially if you've never knitted before; once we get to the actual knitting instructions, it'll come together. 

January 2, 2014

Knitting by Structure, Part 1: Um...What, Now?

Well that was a break I didn't intend to happen.  I'm behind on a lot of things.  Not my knitting so much, but everything else...yeah.  Happy New Year everyone.

Anyway, here's the start of something helpful for once. I've been meaning to do this post series for a bit, but since I'm lazy I just got around to it.  Might as well actually do something useful after some radio silence.

Knitting by Structure Series: The Part Where I Discuss What I Mean By This, Why You Should Read It, and What It Will Cover
(otherwise known as Part 1 - Introduction)

If you've been around the knitting realm a bit, you've probably noticed how most instructions for knitting are set up.  They usually go something like this: Step 1, do x motion.  Step 2, do y motion, Step 3, Profit.  That is, the instructions focus on the mechanics of the actions you need to complete.  They tell you what direct to put your needle, how exactly you should hold your yarn, and wrap the yarn around the needle, and so on. 

It makes the instructions simple, usually self-contained, and has a huge flaw in that it presumes one way of knitting is correct and makes the average student a slave to the instructions.  Ok, maybe that's a bit harsh, but you get the point.  A lot of people will read the instructions, mechanically follow them, and that's all they know.  If they run into an issue, or need to do something else, they have to go off and find more instructions.

I don't mean to pass judgement on the people that do this.  This is how many things are taught.  It makes it easier to learn as you just have to follow the process, right?  It's also how most of us will explain a new technique to other knitters...me included.  It's normal.

However, I propose a different method of looking at the action of knitting.  I think the focus should be on structure than the mechanics of the knitting process.

What do I mean when I say 'structure'?  Well, I mean the focus should be on the why of knitting, instead of the how.  That we should learn to knit by learning how a stitch works and how different actions influence it.  That the act of knitting should be taught by its generic algorithm, and that style (aka, how one holds the yarn and wraps it around the needle), should not be assumed by the instructions.  Make things modular; teach understanding and build up on that.

I will admit, this is a bit harder way of learning knitting.  The learning curve is steeper in the beginning, and you won't be able to jump straight away to producing results.  But the trade-off is that it levels out sooner.  Instead of just learning a certain set of mechanics, and having to learn to troubleshoot or a different technique after you make a mistake or want to change something, you gain an understanding up-front that makes it much easier to avoid some of the common mistakes one sees when learning to knit.  Or to understand enough to change things on the fly.

I will also admit that this line of thinking is a bias of mine.  I currently code for a living.  Condescending an activity to its essence, modularizing it so each part is semi-separated and re-useable, and building complexity on top of previous structure is good coding practice.  It reduces interdependence, makes things re-usable, can save time, and absolutely saves maintenance and enhancement effort later on. And that's the beauty of this approach.  You may have to put more effort in at first to understand what's going on, but later the whole arsenal of knitting techniques is open to you. To slightly extend another programming-knitting metaphor that someone else really came up with, we want to learn how to be more than compilers, reading instructions and changing them directly into fabric.  We want to be able to program the instructions a bit so that when the compiler reads something that doesn't compute, we don't have to spit out an error and leave it at that.

So with that justification out of the way, the following is the outline of Learning to Knit by Structure:
  1.  Learn the structure of a stitch.  What do we mean when we say 'stitch front' or 'left leg'?  How does each stitch interlock with others to form a knitted fabric?
  2. Become familiar with the knitting styles (this is things like English and Continental as well as Western, Eastern, and Combined).  How does each direct you to hold the yarn and wrap it around the needle (at this point we are not concerned on how to actually knit and purl)? 
  3. Learn and understand how each style effects the stitch orientation.  Why do we get the same fabric using different styles?  How do knitting patterns assume it works? What style do you gravitate to (at this point, you must pick a style to learn first).
  4. How do we knit and purl?  What must we do to read the stitch and know where to put the needle and pull the yarn through?  This will be presented in such a way it doesn't matter what style is being used.
  5. Certain things presume a specific structure and orientation in common knitting parlance.  What are they?  How do things such as directional decreases actually work?  Twisting stitches (that is, what does 'ssk', 'k2tog', and 'tbl' really mean)?
  6. There are other basic techniques that don't rely as much on such presumptions, but should still be learned as a basic: other decreases such as yarn-overs, increasing, picking up stitches, casting on and binding off (these may need to be taught before step 4, at least superficially).
At this point, a knitter that has learned and understood these steps can go off and use the multitude of resources out there to pick up more advanced skills.  Short rows?  Cables?  Lace? Shaping?  All these techniques build on the steps above: how does a stitch work, and how do we make it?  I purposed that anyone who has learned the ideas presented above will be able to pick up these kinds of skills no problem...even if all they can find is mechanical instructions.  As well, knowing the whys of knitting should guide you through any issues or mistakes...or even a shift in preferences.  Even when the fix is a hack.  Especially if the fix is a hack.

Now, of course really learning this comes with practice.  Mistakes will happen, something won't click for a bit, that's all normal.  Learning the basics of each step is enough to go on; once a knitter starts actually knitting, they should be able to learn with action as well as theory.  I know people learn differently, and they will gravitate towards what they find easiest.  Which may mean that a step will be done out of order.  That's ok.

However, if you want to learn this way (even if you already know how to knit), it does take one thing: eagerness to know why what happened happened, and a willingness to learn it...at least at the basic explanation level (after all, what is outlined here is skimming the surface a bit.  But we do have to balance why with how, and I get that most knitters don't have time for an academic-level discussion, me included.  Though if you want to go right ahead).  What I mean is that you can't just want the quick fix, just looking for the detailed instructions that you will follow to produce a result.  These are the people also running to someone when they got a virus again by downloading from a shady source a mistake occurs without even attempting to fix it. I get that you may not know off the top of your head (I don't remember much off the top of my head.  That's what the Internet and books are for), but you must be willing to try and learn at least where to find the answer.

Humans are pretty smart cookies.  Knitting isn't rocket science, or even programming.  You got this.

November 23, 2013

The Tale of a Broken Needle, Part 2, Or Why You Shouldn't Switch Needles in the Middle of a Project

The good news is that I finished my Mom's Hanukkah socks with time to spare:


The bad news is that, contrary to every other sock set I've knitted so far, the second one came out a bit bigger than the first:

 
Which sucks because the first was the perfect length.

Now,  I know I did the exact same thing for both of them.  Thing's like these types of cable, lace, motif, whatever patterns make it easy to write 'stop at row x' and to do so, since you're keeping track of rows and can see where you are via the pattern.  No, I'm pretty sure the difference in size is due to the fact that I had to switch needles to knit the second sock.

If you go back to this post, you'll see why that was unavoidable.  However, you'll also note that I mentioned that my gauge shouldn't be that different with another pair of nickel-plated needles.  So, I got all excited and ordered new sock needles for that size:


And just cast-ed on and went, conveniently forgetting that my analysis was based on the fact that the Knitter's Pride Nova needles and the KnitPicks Options are very similar (I wouldn't be surprised if the same manufacture makes them).  What isn't that similar are those Addi's I decided to buy because ooh, needles made for Magic Looping socks!  Must have!

So I failed, and now have two slightly different sized socks: one with a gauge of  11.25 rows per inch and another with a gauge of about 11.75 rows per inch.  And it's not like I can just rip back and adjust it so they're the same length because of the pattern; it'll be very obvious if I did that.  So...it is what it is and hopefully my Mom doesn't mind.

Of course, what I should have done, had I not been blinded by nice, new needles, was go buy the same needle brand.  But what's done is done, and it's not that far off that they're unwearable (and it's better to be bigger than smaller).

Since one of the reasons for this blog is learning from my mistakes, the moral of this story is that you should never switch needles in the middle of a project if you can help it, unless you're able to adjust for it.  And if you do have to, use the same exact needle brand and type (I shouldn't have to mention they need to be the same size too, right?).  Because your gauge really does differ between each needle, no matter if they're made of the same material, no matter how slightly, and that can be the difference between a perfect fit and slightly too big or tight.

On the other hand, the Addi Sock Rockets are really nice needles, and I loved working with them.  May have been worth it.

October 30, 2013

So I Went to Rhinebeck and Brought Back More Photos of Cats Than Yarn (Rhinebeck Debrief 2013)

I said I was going to post about Rhinebeck and...I don't know what to talk about.  I re-read my post from last year and realized that my experience was pretty damn similar.  I went upstate, stayed with family, went to the fair, had a fun time, and went back home.  It was great but it was pretty much a repeat of last year, minus the class I took then.  I didn't take a class this year, so I can't even talk about that.

So, I guess I'll just picture dump then (not that I have many good ones.  I seriously have just as many pictures of cats this year, and none of the yarn):


The view from the porch of the building my sister's apartment was in (slightly north of Duchess County).  Pretty leaves. Still loooove the fall upstate, though it was freezing cold both mornings (it was better during the day).  Dunno what was going on at that church over there though.


Crappy picture; got taken through my windshield
The billboard on the way to the fair!  They seem to use the same design every year, though this is the first time I got a picture.  I shouldn't have been on 9G anyway (the billboard is at the intersection of the road from the Kingston-Rhinecliff bridge (it's also a highway, but I forgot the name) and Rt. 9G.  It's meant for people coming from the bridge, which is why it's at a weird angle here)  Turns out you can drive straight down Route 9 through Red Hook to the Fairgrounds.  Duh.  I turned in Red Hook, got on 9G, and got stuck in all the traffic coming off the bridge to the fair.  Took me 30 minutes to get through it.  On the other hand, when I went Sunday, there was no traffic and I got there early because I was expecting to crawl for at least 10 minutes.

I got to the fair with plenty of time though, and got to see everything this time, more than once (several times in some cases...hey, you miss stuff the first two times). Saturday was crowded (figures with all that traffic), so I did more looking than shopping that day, though my mother and I are a bad influence on each other and so we both ended up with unplanned things that Saturday (favorite quote from her this year: 'I'm buying so  many things for myself this year and not for other people!'  I told her that was a good thing, that she should make stuff for herself).  Sunday I ran around with my sisters, and bought most of the yarn I wanted.  I also convinced my poor college student of a sister that she had to buy some yarn there, he he he.

For some reason, I have no pictures of the actual fair, but a few of sheep:


...and a llama (llama llama duck.  You're welcome for the earworm):


Wait, I took this bad picture of a shawl I really liked and want to knit:


I did buy yarn to do it at the fair, and by buy yarn I mean I bought a skein of heavy laceweight dark blue yarn to go with some royal blue fingering weight yarn I bought two years ago and still haven't used...for a sport weight shawl.  Oops. All sorts of fail there.  For some reason I thought that vendor only sold fingering weight yarn.

Of course I then went a bought what ended up being three skeins of sport weight yarn for a fingering weight shawl I've wanted to do since Phil Plait,of all people, linked to the Ravelry page for it, because of course Socks that Rock Mediumweight isn't actually standard sock weight yarn.  At least that just gets you a bigger 'shawl' (it will most likely go on my wall, not get worn.  It's just awesome).

And before you ask, no, I can't use the yarn I bought for the second shawl for the first and vice versa (well, I could do that first one, but I don't want to).  I need a dark black-blue yarn for the second one and two different colors for the first one.

So...wait, did I mention I have tons of photos of cats? I won't derail completely so I'll just post a few that go with a story about yarn.  Saturday night I spent lazing around my sister's apartment. Of course I had bought some of the yarn I bought that day (not the stuff above.  Other yarn.  You'll see). One of her cats (she has two) first decided it liked the yarn I was knitting with:


And then decided it wanted to get the new yarn in my bag:


And then decided that on top of my yarn and bag was a good place to sleep:

Yes, the socks in the bottom corner are my Crazy Purple Socks.  Had to wear something I made to Rhinebeck...

I eventually moved the yarn to the suitcase so it didn't become cat toys overnight.

On Sunday we did dinner and then I drove back to my parent's place.  Since I was lazing about on Monday as well and never made it to the bus to go back to the city (took off Friday and Monday.  Yay four-day weekend), I took pictures of what I bought:

Lots of gray and black this year

...and then decided to go check out the new yarn store that opened up the next town over this year.  Because Rhinebeck wasn't enough yarn.  Anyway, it ended up being a pretty nice store, and I had a nice chat with the owner since I was the only one there mid-day Monday.  Turns out she had organized a bus trip to Rhinebeck on Sunday, and she also had bought more yarn than she needed (her actual statement was closer to: 'I bought some yarn and then asked myself why I was buying yarn; I own a yarn store').  I also bought a skein of yarn, and signed my mother up for the mailing list because she keeps saying she's going to go check out the store and never does (I also told the owner about her so now she has no excuse). 

After the yarn store, I went to a local park and took more pictures:


I also sat in the island in the middle of the lake and knitted a bit.  Because why the hell not;  I had an hour left on the meter for my car.

And that was my weekend at the New York State Sheep and Wool Festival.  And with the cats.

Next year I'll take photos of the fair instead, I promise.