November 23, 2013

The Tale of a Broken Needle, Part 2, Or Why You Shouldn't Switch Needles in the Middle of a Project

The good news is that I finished my Mom's Hanukkah socks with time to spare:


The bad news is that, contrary to every other sock set I've knitted so far, the second one came out a bit bigger than the first:

 
Which sucks because the first was the perfect length.

Now,  I know I did the exact same thing for both of them.  Thing's like these types of cable, lace, motif, whatever patterns make it easy to write 'stop at row x' and to do so, since you're keeping track of rows and can see where you are via the pattern.  No, I'm pretty sure the difference in size is due to the fact that I had to switch needles to knit the second sock.

If you go back to this post, you'll see why that was unavoidable.  However, you'll also note that I mentioned that my gauge shouldn't be that different with another pair of nickel-plated needles.  So, I got all excited and ordered new sock needles for that size:


And just cast-ed on and went, conveniently forgetting that my analysis was based on the fact that the Knitter's Pride Nova needles and the KnitPicks Options are very similar (I wouldn't be surprised if the same manufacture makes them).  What isn't that similar are those Addi's I decided to buy because ooh, needles made for Magic Looping socks!  Must have!

So I failed, and now have two slightly different sized socks: one with a gauge of  11.25 rows per inch and another with a gauge of about 11.75 rows per inch.  And it's not like I can just rip back and adjust it so they're the same length because of the pattern; it'll be very obvious if I did that.  So...it is what it is and hopefully my Mom doesn't mind.

Of course, what I should have done, had I not been blinded by nice, new needles, was go buy the same needle brand.  But what's done is done, and it's not that far off that they're unwearable (and it's better to be bigger than smaller).

Since one of the reasons for this blog is learning from my mistakes, the moral of this story is that you should never switch needles in the middle of a project if you can help it, unless you're able to adjust for it.  And if you do have to, use the same exact needle brand and type (I shouldn't have to mention they need to be the same size too, right?).  Because your gauge really does differ between each needle, no matter if they're made of the same material, no matter how slightly, and that can be the difference between a perfect fit and slightly too big or tight.

On the other hand, the Addi Sock Rockets are really nice needles, and I loved working with them.  May have been worth it.

October 30, 2013

So I Went to Rhinebeck and Brought Back More Photos of Cats Than Yarn (Rhinebeck Debrief 2013)

I said I was going to post about Rhinebeck and...I don't know what to talk about.  I re-read my post from last year and realized that my experience was pretty damn similar.  I went upstate, stayed with family, went to the fair, had a fun time, and went back home.  It was great but it was pretty much a repeat of last year, minus the class I took then.  I didn't take a class this year, so I can't even talk about that.

So, I guess I'll just picture dump then (not that I have many good ones.  I seriously have just as many pictures of cats this year, and none of the yarn):


The view from the porch of the building my sister's apartment was in (slightly north of Duchess County).  Pretty leaves. Still loooove the fall upstate, though it was freezing cold both mornings (it was better during the day).  Dunno what was going on at that church over there though.


Crappy picture; got taken through my windshield
The billboard on the way to the fair!  They seem to use the same design every year, though this is the first time I got a picture.  I shouldn't have been on 9G anyway (the billboard is at the intersection of the road from the Kingston-Rhinecliff bridge (it's also a highway, but I forgot the name) and Rt. 9G.  It's meant for people coming from the bridge, which is why it's at a weird angle here)  Turns out you can drive straight down Route 9 through Red Hook to the Fairgrounds.  Duh.  I turned in Red Hook, got on 9G, and got stuck in all the traffic coming off the bridge to the fair.  Took me 30 minutes to get through it.  On the other hand, when I went Sunday, there was no traffic and I got there early because I was expecting to crawl for at least 10 minutes.

I got to the fair with plenty of time though, and got to see everything this time, more than once (several times in some cases...hey, you miss stuff the first two times). Saturday was crowded (figures with all that traffic), so I did more looking than shopping that day, though my mother and I are a bad influence on each other and so we both ended up with unplanned things that Saturday (favorite quote from her this year: 'I'm buying so  many things for myself this year and not for other people!'  I told her that was a good thing, that she should make stuff for herself).  Sunday I ran around with my sisters, and bought most of the yarn I wanted.  I also convinced my poor college student of a sister that she had to buy some yarn there, he he he.

For some reason, I have no pictures of the actual fair, but a few of sheep:


...and a llama (llama llama duck.  You're welcome for the earworm):


Wait, I took this bad picture of a shawl I really liked and want to knit:


I did buy yarn to do it at the fair, and by buy yarn I mean I bought a skein of heavy laceweight dark blue yarn to go with some royal blue fingering weight yarn I bought two years ago and still haven't used...for a sport weight shawl.  Oops. All sorts of fail there.  For some reason I thought that vendor only sold fingering weight yarn.

Of course I then went a bought what ended up being three skeins of sport weight yarn for a fingering weight shawl I've wanted to do since Phil Plait,of all people, linked to the Ravelry page for it, because of course Socks that Rock Mediumweight isn't actually standard sock weight yarn.  At least that just gets you a bigger 'shawl' (it will most likely go on my wall, not get worn.  It's just awesome).

And before you ask, no, I can't use the yarn I bought for the second shawl for the first and vice versa (well, I could do that first one, but I don't want to).  I need a dark black-blue yarn for the second one and two different colors for the first one.

So...wait, did I mention I have tons of photos of cats? I won't derail completely so I'll just post a few that go with a story about yarn.  Saturday night I spent lazing around my sister's apartment. Of course I had bought some of the yarn I bought that day (not the stuff above.  Other yarn.  You'll see). One of her cats (she has two) first decided it liked the yarn I was knitting with:


And then decided it wanted to get the new yarn in my bag:


And then decided that on top of my yarn and bag was a good place to sleep:

Yes, the socks in the bottom corner are my Crazy Purple Socks.  Had to wear something I made to Rhinebeck...

I eventually moved the yarn to the suitcase so it didn't become cat toys overnight.

On Sunday we did dinner and then I drove back to my parent's place.  Since I was lazing about on Monday as well and never made it to the bus to go back to the city (took off Friday and Monday.  Yay four-day weekend), I took pictures of what I bought:

Lots of gray and black this year

...and then decided to go check out the new yarn store that opened up the next town over this year.  Because Rhinebeck wasn't enough yarn.  Anyway, it ended up being a pretty nice store, and I had a nice chat with the owner since I was the only one there mid-day Monday.  Turns out she had organized a bus trip to Rhinebeck on Sunday, and she also had bought more yarn than she needed (her actual statement was closer to: 'I bought some yarn and then asked myself why I was buying yarn; I own a yarn store').  I also bought a skein of yarn, and signed my mother up for the mailing list because she keeps saying she's going to go check out the store and never does (I also told the owner about her so now she has no excuse). 

After the yarn store, I went to a local park and took more pictures:


I also sat in the island in the middle of the lake and knitted a bit.  Because why the hell not;  I had an hour left on the meter for my car.

And that was my weekend at the New York State Sheep and Wool Festival.  And with the cats.

Next year I'll take photos of the fair instead, I promise.

October 27, 2013

The Tale of a Broken Needle

I finally got to the toe of the first sock I'm making for my Mom:


I was all like, whoo hoo, I only got 18 rows left. I'll finish the sock while at the laundromat.  I'm on track for getting both done by Haunukkah.  So I packed up my laundry and my knitting (standard protocol), get to the laundromat, start my laundry, and knit one row before one of the needles decided to rip away from the cable:

Sorry for the crappy pic, but you get the idea
Not pop out (I've had that problem with KnitPicks needles before).  The cable broke. Granted, magic loop is hard on the circular needles and that spot had been snagging a bit, but this is the first time I've had one break.

My first thought was: ah, man, now I got to order another one and wait a week to finish the sock.  You see, I'm not one of those knitters that has a gazillion copies of the same needle (I have a few repeats, manly within the interchangeable set, but not many).  For my long sock-sized circulars, I have one circular of KnitPicks Options solid 47" in each size from US 0 to 3, and three Knitter's Pride Dreamz wood needles in sizes US 0 to 1 1/2.  And the only reason I own the wood ones was for the last socks I made for my Mom, in which I used an alpaca/silk blend that did not tolerate my metal needles at all.

This is actually important to the story.  Because, you see, when I ordered the three wood needles from WEBS last year (which got delivered right after Hurricane Sandy.  I was impressed it got here at all), there was a mistake in the order.  They had shipped the size 0 and 1 1/2 Dreamz needles, but had sent me the size 1 in Knitter's Pride's Nova line, which is a metal needle very similar to the KnitPicks Options.  So I contacted them to inform them of the mistake and asked how I should ship the metal needle back so I could get the wood one I wanted.  They told me to keep the metal one and they'd just send me the one I ordered (which they did very quickly because WEBS is good people).

Guess what size I just broke?


Yep, the size 1s.  So someone else's mistake worked in my favor today, and I can finish the sock and start the new one without having to wait for a new needle.  

Now, a few of you may be going: But wait, didn't you say you had the wood ones as well?  Isn't that also a backup?  No, and the reason is because different needles can produce different gauges, and this effect is in full force if the needle is a different material.  Since wood is less slippery than the light metal used for the Options/Nova needles, it causes a slightly bigger gauge.  For me, it usually has an effect of making my gauge a half stitch bigger. Now, there is the slim possibility that the Nova needles will also change my gauge, but since they are the same material, it's way more likely to have a small effect if anything.  If I was doing it properly I would re-knit a swatch to make sure.  Since I'm on the toe of the first sock, I really don't care.  As long as the toe and the second sock don't come out radically different than the first one (which can happen even with the same needles for me), it'll work.

Now, I'll fully admit that there is another solution I didn't think of until now.  I do have the full Options sock DPN set as well. I could switch to those, just to finish the toe at least (I would be very wary of trying to knit the second one on DPNs after doing the first one Magic Loop.  Despite it being the same brand of needle, DPNs screw with my knitting style and therefore will most likely change the gauge even more.  And there's the fact that I don't like DPNs).

Nothing like the random coincidence that ends up working out. Anyway, at least I pack backup projects and got some of another present done:


[And yes, I know I haven't done the Rhinebeck debrief yet.  I'll be honest and say that it was great but very similar to my experience last year, so I dunno what to actually debrief, which is why it's not the post before this one.  I'll show off yarn and pictures at least.  Next post.]

October 13, 2013

Unrealistic Expectations

I have a problem I think most people have, but anyway it's a problem.  I seem to think there are more than 24 hours in a day.  And that within those 24 hours, I can be superwoman and accomplish all this stuff, despite the fact that I can't even get my ass moving too fast (like now).

In other words, it's October, and I of course have way too many projects going on.

It's a bit worse this year, though.  The first issue is that I decided to make almost everything for my Halloween costume this year, so not only am I knitting a couple of items (one done, the other in progress:


), I'm sewing a dress.  Sewing takes up a lot more time since you can't just do 'a couple of rows' like in knitting, and is not portable.  At least I have a machine now:

The fact that it lives on my dining table is another problem
The good thing about the sewing machine is that it does save time.  The bad thing about the sewing machine is then I think I can whip out a full dress in a couple of days.  No.  No, I can't.  Especially since I'm a novice, crappy seamstress.  I then think I can do more than I can within the three or so hours after work I have.  Except when I don't because I went out to dinner.

So that's taking away from my knitting time.  Other things taking away from my knitting time are the NYC Yarn Crawl (for which I bought more yarn I didn't need) and NYS Sheep and Wool (this weekend!  Buy more yarn I don't really need!), and concerts (I've got three shows this month I went/am going to), and my boyfriend (which is related to the concert and dinner thing, at least).  And I can't even be pissed about it; I enjoy it all. But when did I gain a life?  Actually...never mind that, when did I become an adult with all these adult responsibilities on top of it all (you know, because I also really need to cook two weeks worth of lunches, do laundry, and clean the bathroom today)?

The second (third?) issue is that not only am I working on things for Halloween, I had to start everything for Hanukkah this month as well, since the first night is the evening before Thanksgiving (American, so that would be late November).  Usually I get last-minute present plans around Rhinebeck, get the yarn there, and start early November.  It works if Hanukkah is at least mid-December (though I still run into scheduling issues).  It doesn't work this year.  The good thing is that I did plan ahead on some things, and I have one present done, and I got a jump start on my Mom's socks.  The bad thing is that I currently have two more projects (including the socks) going for that because why not start another knitted present while I'm working on one already:

Ignore the gray skein...that isn't a project, just some random yarn I thought I might use and didn't
Well...started being relative.  I did swatch and do some calculations for one of them so far.  The reddish one is the Jane Bennet socks from the Summer 2012 issue of Jane Austen Knits.  I didn't pick the pattern; I had my Mom search Ravelry for a sock pattern she liked, and made the yarn I'm using the surprise (last year, it was the other way: she knew what yarn I was using, but didn't really know the sock pattern until I had to try them on her....ok, so we don't really do the surprise thing here.  It's just that she hasn't seen the work in progress yet). 

Oh, and I'm knitting another sock for a KAL:


Yeah, that's not getting done anytime soon. 

And don't even ask me about the tank pattern; I haven't started writing it yet.

September 30, 2013

Don't Bring Your Knitting to a Football Game

So, a couple of weekends ago I went to go see the Jets/Bills game at the Meadowlands.  I've wanted to go see a Jets game for awhile now, but despite the fact that the Giants/Jets stadium is only a twenty minute train ride out of the city, game tickets set you back at least $80 alone and I never bothered thinking about it when I needed to.  Until recently that is, when a conversation about the Super Bowl (also at the Meadowlands this year) turned into my boyfriend and I making a quick decision to buy tickets for the game a week later (because we're nuts).

To bring this back to yarn craft, I have a habit, passed down from my crocheting and football loving mother, of knitting/crocheting while watching the game.

If any of you watch (American) football, you'll know that there are usually nice gaps of time within the game: between plays, half time, two-minute warnings, etc.  As well, we were planning on getting there at least an hour early (ended up being an hour-and-a-half) so that we could find our seats, get beer (which is way overpriced there, but anyway), and so forth.  Therefore, I looked up the stadium's policy to see if I could bring my knitting.  Which was a good thing, because it turns out you can't bring anything but one very small purse and one clear bag of a certain size into the stadium (which damn, I've never heard of a bag policy like that before).  However, no where in their policy does it say things such as knitting needles are banned.  Weapons, sure.  Outside food and drink, sure.  Non-clear bags, yep, in detail.  Actually, within the whole clear bag policy description it said something like (paraphrasing): 'this is not a ban on what fans can bring into the stadium, just what they carry it in.'  So I brought my knitting with me, along with the bunch of random crap (phone, binoculars, etc) in a clear zip-lock bag (well, I used a small fold-able bag to get it there because I didn't think running through the city carrying all my stuff in a clear zip-lock was a good idea.  I then folded the not-clear bag up into a tiny square and put it in the clear one).

I then got to the stadium gates, bag in hand, and handed it to the women checking bags in my line.  The following then took place:

Security Woman (looks at better dressed security guy...probably her supervisor):   Hey!
Supervisor: Hello!
Security Woman: Can you come over here; this is the first time I've seen this.  (At this point I'm standing behind her wondering what she could have found in my bag).
Supervisor: Sure. (Comes over).
Security Woman: Is this allowed?  She's got her sewing with her (holds up the project and needles that she fished from my yarn ball).
Supervisor: Nope.
Me: Really? (mumbles) This is why I checked the website, there was nothing about knitting there...

So I had to go take my knitting and go back outside the gates to the bag check, in which the person looked at me quizzically when I held up the knitting and asked to check it.  Oye. Luckily the game was fun (and the Jets won, yay), so I didn't miss it too much.

So don't bring your knitting to a NFL football game; it may not be let in.  Though, in hindsight, I probably should have tried it with wooden needles first, not size 1 metal ones.  Those can look a bit scary, even though they're a sharp as a well-sharpened pencil, which I'm sure is allowed. But I'm not sure if even the wooden ones would have been let in; their only advantage is that they are dull, and so they may have passed under the security women's radar since she couldn't even tell the difference between knitting and sewing enough to know what the hell the yarn was for.

August 26, 2013

Sometimes the Mistakes Work in My Favor

First, it's time for a beer because in this whole post, most of it works out in the end (or maybe it was time, thought I guess it's always time because it's always beer'o'clock somewhere):

In the interest of explaining that I'm not an alcoholic, I took this picture weeks ago.  It is really too late for a beer right now.
 Anyway...a couple of weeks ago, I started the actual knitting process for the tank I'm designing.  And started it.  And started it.  But after that, I finally got past the first five rows and managed to make some progress on the garment.

I then did the absolutely correct thing and after getting a bit into it, I steam-blocked it and re-took my gauge measurements. It turns out that, of course, the gauge swatch I made, and even took measurements on just like the class I took told me to (take a bunch and average), is a lying liar that lies.  My gauge in the project is about 0.5 stitches more per inch than I used for my calculations, and 1.5 rows less.

My first thought was 'oh, great, I got to rip it out AGAIN.'  But first, I went back to my spreadsheet and changed the gauge listed there.  I looked at the new results of my calculations.  Looked back at the garment.  It didn't seem right.  If I were to cast on the number of stitches my spreadsheet now produced with the new stitch gauge, it would be too big for me.  To test this, I tried on the little bottom strip I had.  It fit as is. 

So, screw it, I'm keeping my calculations as my original stitch gauge.  This yarn has some sort of weird gauge warping ability, as this isn't the first time something's come out bigger than it should in this yarn (remember my first tank attempt?).  I should note that this is after I calculated a -1 negative ease into my calculations because I was worried about the cotton stretching too much. Oye. But that part worked out.

However, that leaves me with the row gauge being off.  Now, I had already started on the waist shaping, so changing the row gauge would mean changing the whole frequency of the shaping.  This meant I may have to rip it out, at least part way, anyway.  So, steeling myself for the inevitable, I went back to my huge spreadsheet and stuck in the new row gauge.

I then looked at the column for my custom size and went 'huh?'  It had barely changed.  All the standard size ones had changed, but my size didn't.  It didn't make any sense.  So, I kept studying it and tracing back my calculations...only to find that I had pointed to the wrong cell for a couple of the length calculations, and it was calculating a length about half of what it should be.  The waist decreases were wrong in the first place, let alone the row gauge being off.

This is where I would have thrown up my hands and walked away, except that when I fixed the calculations, the frequency of decreases it returned not only made more sense, it worked with what I had already done!  My other mistake had literally saved me from having to re-do the waist shaping already completed.

So, sometimes, they work in my favor.  If only I could say the same thing for a couple of other things I've done recently, like get a hot iron too close to an acrylic baby sweater (no, a piece of scrap linen does not work in substitute for a pillowcase), or cutting fabric (me? Cut or sew straight?  Never.  This is why I like yarn craft, you build the fabric, not cut it and attach the pieces into shapes).

And before it's asked, no, I didn't completely ruin the baby sweater with that bit of stupidity.  It's just a bit shiny and slightly different color green (yes, it looks blue in the photo.  It's not; it's green) in the front (because I was trying to get the bands to lay flat, despite the fact that that is why you knit them, but that's another post):


At least my first attempt at colorwork was successful:


So...I can still knit?  Yay!

August 19, 2013

Knitting Computer Style

In my usual blog travels (which, maybe surprisingly, usually have nothing to do with yarn craft), I came across a link to an article on how the process of knitting can be described using computational concepts.  Which, while rather technical, is pretty brilliant.  Or maybe it's brilliant because it's technical. Anyway, there's a couple of concepts here that I'm just in love with, and that, now I've read them, are completely obvious to me.  My favorite one is idea of the working stitches acting like a stack or a dequeue.  I think it's a good way of looking at the knitting process rather differently, and they do work pretty well as a metaphor.

On the other hand, she brings memory and storage concepts into it to explain the yarn and completed fabric parts to go with the stack/dequeue metaphor, which is completely valid and it does complete the metaphor [1].  However, the more I  think about it, the more I think that there's another way to extend the metaphor.  We can just treat all the stitches in the knitted piece, on the needles and in the fabric, as a linked stack and linked queue.

What's a linked stack, you say?[2] Well, a linked stack is a stack that is implemented with a linked list.  Ditto with linked queue. A linked list is a data structure that involves nodes (treat this as black box objects for now, I'll get to it later) that contain pointers pointing to the next node.  The Wikipedia link for linked list has the normal representation of such an object, but for the sake of not breaking out a drawing program, I'm going to write them like this: {1} -> {2} -> {3}, where the -> symbol represents the pointer.

The thing with a linked list is that you can easily traverse the list; each node will lead to the next one.  They are connected objects.  Also, unlike what you see above, the object in the list doesn't just have to be a number.  It can be any data object...such as a custom structure.  I'll get to this a little later, but for now the class looks like this:

struct myObject
{
      int Value;
      myObject *next; (this is the pointer to the next object)
}

Or, in my drawings, like this: {1} ->

Now, a stack is an data structure that is built to only allow two main operations on each object in the stack: you may push an object onto the stack or you may pop the item off the stack.  This causes the stack to implement what they call Last-In, First-Out (LIFO) data processing.  For example, think of coasters in a holder. The holder acts like the stack storage object, and the coasters themselves are the objects.  If all the coasters are outside the holder (say you had a party and they're now in places you'd never think to look, like behind the toilet), the stack is empty. You don't think coasters should be behind the toilet, and you need to sit down somewhere, so you push three of the coasters back in their holder. 

Then you decide that you need a cup of coffee, and you should use a coaster because while your place is trashed already, someone definitely spilled beer on your coffee table, and you don't want your coffee cup to stick to it.  So you 'pop' the only coaster you can grab in the holder: the one you last put in.

(Then you say screw it; I'm too hung over for this shit and go back to bed.  But you come back, like you always do. Anyway...)

Now, how does this fit in with a linked list?  Well, we use a linked list to represent the actual stack.  First, though, we need an object that points to the top object in the stack.  Let's call it topItem, and it'll be represented like this: {topItem}

That's the coaster holder.  Now, I push three items to the stack by creating the first node ({1}), and assigning topItem the pointer to that node:

{topItem} -> {1}

{1}'s pointer is null, since there's no object before it.  I then create the second node ({2}), assign the value of topItem as {2}'s pointer so it's linked to {1}, and then point topItem to {2}:

{topItem} -> {2} -> {1}

 Repeat for {3} and:

{topItem} -> {3} -> {2} -> {1}

If I want to pop the last one, I just access the topItem pointer, which is pointing to {3}, take that object, and then re-assign topItem to the same value as the pointer in {3}:

{topItem} -> {2} -> {1}

That's the basic idea of a linked stack.

A queue, on the other hand, works via a First-In, First-Out (FIFO) methodology instead.  The first object you push in (enqueue the object) is 'popped' on the other end of the list (dequeue the object).  This is implemented using a linked list by creating another object to point to the last object in the list. We'll call it lastItem ({lastItem}).

Now I enqueue an object:

{topItem} -> {1} <- {lastItem}

Since there's only one object, both top and last item have the same pointer value.  Now I enqueue another one:

{topItem} -> {2} -> {1} <- {lastItem}

You get the point.

So how does this fit with knitting?  Well, let's create another structure called Stitch:

struct Stitch
{
      int stitchID;
      int baseStitchID;
      Stitch *next;
}

This, as you could guess, represents one 'knit' stitch.  Now, it would have more properties in the real world, but we're going to stick with this for now.  We'll now represent this structure like so: {id, base} ->

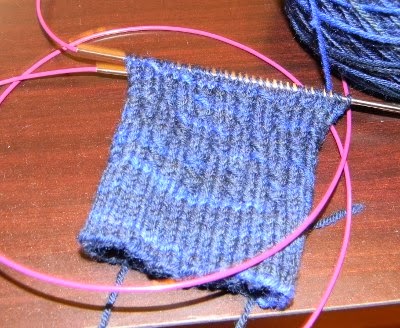
Now it's time to knit.  We get our resource pool (the yarn) and our needles.  The needles will represent the stack/queue, and the point of our needles will be the top and last items, depending on how we knit.  However, since right now there's no stitches, we have to start with the right needle representing the stack only, and the left will be pointing to the top. So, let's cast on 5 stitches:

{topStitch} -> {5, 0} -> {4, 0} -> {3, 0} -> {2, 0} -> {1, 0}

The baseStitch is 0 because this is the cast on edge.

We want to knit straight, so we need to use the linked stack structure. Now the right needle becomes the left, and the right point is pointing to our top stitch.  Now we knit by creating the next stitch object with the next ID number (6) and popping the last stich on the stack to first get the baseStitch:

Stitch newStitch = {6, 5}

{topStitch} -> {5, 0} -> {4, 0} -> {3, 0} -> {2, 0} -> {1, 0}

Now, he pointer of stitch 6 must be assigned the pointer value of topStitch, and topStitch now should be assigned to the new stitch, since stitch 6 is connected via the yarn path to stitch 5.  We now push both 5 and 6 back onto the stack (though in the needle world, it's now split between two needles and the fabric).  It now looks like this:

 {topStitch} -> {6, 5} -> {5, 0} -> {4, 0} -> {3, 0} -> {2, 0} -> {1, 0}

We knit the rest of the row.  Now all the live stitches are on the right needle, and there's a row of knitted fabric below.  However, the stack repersentation will look like this:

{topStitch} -> {10, 1} -> {9, 2} -> {8, 3} -> {7, 4} -> {6, 5} -> {5, 0} -> {4, 0} -> {3, 0} -> {2, 0} -> {1, 0}

You can tell by the baseStitch value what loop we've drawn the active loop through, but as like real knitting, we can't just jump to that base stitch. The pointers here are representing the path of the yarn.  For example, say if we screwed up and needed 6 stitches in the fabric below, we would have to pop stitches 10 to 6 (and lose them in the process since we can only save one temporarily when we're working with it), and push the new object {6, 0} to point to the right stitch.

On the other hand, to work in the round, we need to be able to 'pop' off the first stitch as well so we can get the value of the baseStitch for the new stitch.  We can't 'pop' the first stitch, but if we use lastItem (now lastStitch), we can dequeue it.  So let's go back to our cast-on:

{topStitch} -> {5, 0} -> {4, 0} -> {3, 0} -> {2, 0} -> {1, 0}

Since the needles are somehow connected, one active needle point is topStitch, and the other has been created as lastStitch:

{topStitch} -> {5, 0} -> {4, 0} -> {3, 0} -> {2, 0} -> {1, 0} <- {lastStitch}

Now we knit the next stitch, which happens to be the first one in the queue.  So, we first create a new stitch by dequeuing the lastStitch to get the baseStitch, but using topStitch to get the next ID:

Stitch newStitch = {6, 1}

{topStitch} -> {5, 0} -> {4, 0} -> {3, 0} -> {2, 0} -> {1, 0} <- {lastStitch}

We now do the same steps as the stack: assign the new stitch the pointer value of topStitch, and topStitch the pointer to the new one, and enqueue the new stitch:

 {topStitch} -> {6, 1} -> {5, 0} -> {4, 0} -> {3, 0} -> {2, 0} -> {1, 0} <- {lastStitch}

However, now the last stitch is the second to last one in the queue, so it needs to point to that one.  This is the one point where we hit a pitfall with this implementation.  To get the new lastStitch, we have to go through the whole queue to get the pointer value of stitch 3, since we can only follow the yarn:

{topStitch} ->{6, 1} ->{5, 0} ->{4, 0} ->{3, 0} ->{2, 0} ->{1, 0}
^
|
{lastStitch}

This, of course, is why the author used an array-based dequeue instead.  It avoids this pitfall, and you could still implement a restriction for the knitting/tinking action to only use topStitch via a knitting class that implements a special case of the dequeue.

There are other pitfalls with this idea in terms of computational use that make this method a bad idea in the real world.  It's nowhere near the most efficient way, as you would eat a lot of memory storing a sweater's worth of stitch nodes like this.  Having the ability to more quickly call up the node doesn't offset this as knitters (usually, ha) don't tink most of their stitches, and so they most likely won't be accessed again (ripping it all out would be akin to deleting the stack/queue).  But while the author may be building towards modeling the act of knitting on a computer and is concerned about these things, I'm just using technical metaphors and this way allows more simplistic operations and an interesting parallel to how the yarn actually flows.  Metaphorical computers have infinite memory and processing power.

Well, mine does at least.

******************************************************************************
[1]:  I am nowhere near as smart or learned than the author of the article and maybe even you.  So this and most likely the rest of this post may be a bit presumptuous of me.  I'm just a high-level language using programmer who has an undergraduate degree in computer science and likes to build stupid, simple, shit.  Theory was never my forte. 

[2]: While I'm linking to Wikipedia, I actually got my old data structures textbook out for reference.  It's called ADT's, Data Structures, and Problem Solving with C++. by Larry Nyhoff.  I have the Second Edition, which is most likely old now in textbook years.  Stacks can be found staring on page 315 (Chapter 7) , linked stacks starting on page 353 (Chapter 7, Section 3), and linked queues starting on page 413 (Chapter 8, Section 3).

July 29, 2013

Plans, Classes, and Decisions

In the black hole of my disappearing act, of which only part of it had to do with knitting, I've been trying to design a tank.

It is not the same tank I started with in the last post, no.  That was the tank I did my usual 'throw planning to the wind, swatch once, and start' act on, and it failed miserably.  I was so certain I would start from the bottom, but I kept ending up with too many stitches.  Several tweaks later, I decided to start at the band.  I calculated how many repeats I would need based on a similarly designed swatch, and went at it.  It started looking a bit big, but no matter, the cables will close it up.  It kept looking a bit big until I ended the chart, held it up to me, and...oops, did about seven too many repeats. 

I checked my gauge, found it wanting, so I looked at my half-assed calculations, which were changing with every whim I hit.  It was all wrong.  I ripped out the last ball I joined, looked at it, and...decided that this was the wrong yarn to use.  Too bulky, too big, didn't work.

Oye.

So I started hunting down more suitable yarn.  I actually went and bought a skein of one 'okay it may work' yarn and wound it up.  Then I decided to work on other things that didn't require as much thought (and need to get done as well):

Also, I'm still not done with the baby sweater and my Mom finished the blanket already.  That never happens!
Well, ok, maybe a little.  I had to rip out a few things in that sweater too. 

Anyway, while I was putzing about on where I would get the yarn for this tank I want to make, I also kept thinking about what to do with the yarn I had originally bought.  It was just sitting there because I didn't bother putting them up, of course.

Then I got a better idea.  Another tank, but one that would work with this yarn.  Simple, easy...


 ...and, it turns out, a pain in the butt to calculate everything. Of course it is.

I know this because I swore I would do this properly this time.  I would not quickly calculate how many to cast on for my size and go.  I would swatch properly, calculate everything out, then adapt to my size and go.  It helps that I got a 'up to 75% off your first class' coupon from Craftsy (because I signed up and only took free courses, then forgot about it) and I used it for this class.  Because, hey, ten bucks for instructions on the crap I keep doing wrong; it's a good deal, right?

Well, I haven't finished the class, but while it was worth the 10 bucks for the sparks I needed to figure out how to organize this stuff into a set of competent calculations, there are parts I've either 1) got so bored because it was below my skill level (computer skills, actually, not knitting.  She explains in minute detail how to use a spreadsheet.  I get why, but some of us have, you know, even programmed macros before) or 2) didn't get the reasoning behind it.  I'm at a part that is supposed to help me, but her setup wasn't working out for my tank.  I don't know why, because there's some magic numbers in her calculations and even when someone asked her in the comments to explain it, she didn't.  But thanks to the comments, I remembered I bought this book:


It was a random, get free shipping on Amazon buy.  I half-forgot about it, thinking a lot of it wasn't so relevant.  However, a comment in the class pointed me in the right direction, and I found that it contains a much simpler way of doing the same thing.  That worked.  Translate it into a spreadsheet to auto-calculate and...ta da.  Another thing half done.

Because desipte having spent...I don't know, three weeks doing this, I'm still not done.

Ok, part of it is my life intruding.  But most of it is because I keep going off on one tangent, deciding against it or running into a brick wall, and going off again.  That part of the class I got confused on?  Was about calculating slope.  Which I first tried to do using inches and the slope of a line formula, and couldn't quite even out the slope to go where I wanted it to in stitches.  That's when I watched that segment of the class.  So I've done that part about three times now.

At this point I could technically cast on.  I have the stitch count where I need it, I just need to adjust for my size directly (I've been using standard measurements so I have a constant).  However, since my efforts have been all over the place, I'm not sure if I have everything to at least easily calculate where to proceed.  And I'm still not done with the class.  Decisions, decisions. The problem with designing is there is no base and way too many decisions.

So, I'll probably continue on to the end of the class, then do a quick look at what I have and start writing/knitting  But it's taking all my effort not to get frustrated at all the wasted planning and just cast on already.  However, we know where that goes.  It goes like this:


Badly.

June 23, 2013

Why You Should List a Gauge For Your Pattern

I seem to have a knack for finding the patterns that don't give a gauge.  It annoys me.  I usually use the pattern anyway, but it still annoys me.

Granted, this tends to happen on free patterns, so you would think I shouldn't complain.  However, as someone who also has developed free patterns, I know how easy it is to get and list the gauge for most patterns.  Yardage missing?  Sure, that's pretty hard to guess at and you need a ounce scale to properly calculate it (and I know I don't own one of those).  Gauge?  No excuse.  None.  I behove anyone who's releasing a pattern to the world to give the gauge, and here's why (and why it shouldn't be an issue):

  1. It allows the user of your pattern to make sure they'll get the same product you did. People knit and crochet differently and have different tension.  That means while you got an adult sized hat using size 6 needles, someone who knits/crochets tighter than you could end up with a child sized hat following the same instructions.  If you don't give a gauge, there's no way for the user to check to make sure they're going to get that adult hat without following your pattern and ending up with disastrous results.

  2. It allows to user to adjust the pattern themselves.  Sure, if it's a free pattern, you could be lazy and only give one size.  That's ok; we understand.  But when you do that and don't give a gauge, the user will be left either wondering what to do to adjust for, say, using a different brand of yarn (which will affect gauge even if the same weight) or how to adjust for their particular size (after all, why go through all the work of making it if it's not going to fit right?).  A stubborn yarn crafter like me may reverse-engineer it, but that's asking a lot from your users just to make sure they get what the picture shows.

  3. It's not hard to calculate and list.  This is the crux of the above.  Sure, there are many useful details that can be in patterns, but some of them require special equipment or some major calculations.  I understand if you don't want to go through that.  But gauge is not one of them.  You did a swatch and/or created the item you wrote a pattern for, right?  You may have winged it and wrote the pattern later, but that means you have the finished item.  Get a ruler out and measure your gauge.  If you're simply writing the pattern, you either got the gauge from a swatch or you're using a set gauge to calculate out your pattern.  Show you work; list that gauge!  There is no excuse not to know that information.  List it on the damn pattern.
So, yeah, you get what you pay for.  But if you have any ounce of kindness towards those you wish to use your pattern (or don't want a flood of emails from the users), list the gauge.  You should know it, so let your users know it too.  Yes, I know that some items it doesn't matter so much (like, say, blankets), and it's not so bad seeing no gauge listed there.  Still, it'd be nice to let you users know because they may end up with a lap blanket when they were trying to create a full one.  Anything wearable?  List gauge; no excuse.  It's needed. Socks are one of those items.  Hats are too.  Some people have big/small heads or big or small feet than 'average'.  Even if the pattern is 'one size', list gauge.  Give your users the tools they need to make your pattern work for them. It'd make everyone happy in the end.

June 3, 2013

I Have No Excuse

Actually, I do have a few excuses.  They're just not very good, so I'll save the hee hawing about how I haven't done anything with this blog in more than a month and just catch up with the projects I finally managed to have time to sit down and start.

First off, though, do you remember these socks I made?


Yeah, I don't expect you to.  Anyway, they were my first pair that I knit up using a skein of
Fiber Optic Yarns Foot Notes that I randomly bought the first time I went to Rhinebeck. Just so you know, they made one tough pair of socks.  You see, they're the only wool socks I own at the moment.  Any of you in the northeast on Memorial Day weekend know that it was cold and rainy that weekend.  I went camping in it, well, until the wind broke most of our common tents on Sunday and we had to pack up and call it a trip.  However, the worst of the rain and cold was Saturday, and I wore those socks throughout most of that day (because who cares if they're not period when you're getting rained on all day).  They got wet, muddy, and absolutely trashed, to the point that they were so soaked I had to take them off because my feet were going numb from the wet and cold. 
Because they were so messed up when I got back to my parent's house, I decided to throw all caution to the wind and run them through the washer (well, that and my parents don't have a good place to handwash things.  And I already had asked them if I could wash my boots in the kitchen sink).  And taa da:


They look just as good as they did before the camping trip.  Granted, this was after I washed them again in my sink so I could block them properly (I noticed they bled somewhat when I did that, which never has happened before I machine washed them.  Luckily, I washed them alone in the sink, and with dark clothes in the machine).  But I have to say, not the softest or warmest yarn for socks, but pretty tough. Which is good.

So, now that I have more time, I've finally set down and started designing the tank I wanted to do.  Did I ever mention that before?  Anyway, I've wanted to do a purple and silver tank for awhile, though the design in my head has changed every now and then.  About a month or so ago, my knit group went on a field trip to WEBS, and I got a lot more yarn (<sarcasm>because I don't have enough of it at the moment</sarcasm>):


There, I managed to find a cotton yarn that wasn't Prima Cotton for once:


I then changed my whole idea of what I was doing and stopped there because I had other shit to do.  However, this weekend I managed to finally sit down and calculate out the measurements and stitch counts I needed to at least start the tank:


Hopefully it doesn't become a wreck.  If I'm really lucky, I'll be able to size it and have a new pattern!  Honestly, writing a shirt or sweater pattern has spooked me a bit, but that's another post.

Also, I started swatching for a baby sweater:


Because as luck would have it, right before I went to WEBS I found out another cousin of mine is having her second child.  So I bought yarn to do a baby sweater, which of course ended up being a sport weight yarn despite the fact that half the patterns I have are for worsted.  However, it turns out that my gauge isn't too far off for this sweater, and I just have to go a size up from the size I want to do to get that size.  It should also make a nice, lightweight cardigan (since most of my cousins live in warmer climates...boo...).

Finally, I'm still working on those other socks:


One and a half done, another half to go.  A good, easy, project with some yarn from Rhinebeck.  I tend to buy sock yarn at Rhinebeck, don't I?

Anyway, I should get back to actually getting some knitting done.  Or maybe other things done.  But knitting's better.


April 15, 2013

Crash Landing

Despite the fact that I have all this sock yarn that I should be using, I've been focusing my subway knitting time on an old project:


Yep.  Squares again.  I realized recently that I had technically started this project over a year ago, and hadn't touched it in months.  Of course, this UFO's whole role was to give me something easy to do when I was between projects.  Unfortunately, I've been lining up my projects very well, and so I hadn't done much with it until recently.  And the only reason I picked it up again is because I've been so focused on sewing (which, yes, I'm still doing.  It will never end!), and then my sweater got too big to do on the subway:


(It's being knit on...twice a week...and is starting to annoy me....it'll never end either).  So while I haven't got a lot of knitting done, I'm at least making progress on an old project. That's what I keep telling myself, at least.

Though, I kind of want to start a pair of socks.  Because all I need is another project.  Oye.

March 30, 2013

Guides for Self-Taught Crocheters: Just How Do I Hold the Hook and Yarn Anyhow?

It's about time I do something for the crocheters out there.  I tend to focus on knitting for these posts since I learned how to knit in recent memory, and so I come across stuff in my own travels.  On the other hand, my mother taught me to crochet when I was 8.  It's been awhile.

However, I was in a conversation recently about how one hold the yarn and hook in crochet.  Turns out there's a lot of unofficial variation out there, despite there being only two ways to both hold the hook and to actually crochet.  So I figured that it would be a good idea to not only cover the official ways, but some of the variations out there as well...because, you never know, you may like it better!

Styles vs Variations vs Whatever You Call It
First note that no matter what you may think, the term crochet style is not used the same way the term knitting style is.  A knitting style, as you may know, is how you hold and manipulate the yarn to produce all your stitches.  Crochet style...let's just say that it isn't used much to mean how you hold the yarn and hook to produce your stitches.  That would make too much sense.  Unfortunately, searching fails here.  After searching for the term crochet style on Google, it seems like no one uses it the same way at all.  The first entry is a Pinterest board and the second is a eHow article where the author calls both Tunisian crochet (a different yarn craft with different tools and stitches) and free-form crochet (I could see the usage, but I would call this an approach) 'styles'. It doesn't get any better, on the first two pages at least.

The truth is, there isn't a comprehensible term because the 'styles', in the knitting sense, aren't modular packages like the knitting styles are.  You have the hand you use to hold the hook, and then you have variations that you can pick and choose to use with the hand-style.  I'll call the first the base, since all variations follow from this.

Speaking of such, variations are things like how to hold the hook and wrap the yarn around your fingers. Basically, variations of the standard way of crocheting.  Some of these may be 'official', but some may just be the way you learned or fell into.  I'll cover some of the more popular ones here.

The official ways of holding the crochet hook are sometimes called positions or holds as well.  As you can see, terminology really isn't consistent in crochet.

The Base of Crochet Methods
All variations to crocheting start with what hand you use to hold the hook.  The hand you use to hold the hook is usually determined by your dominate hand, so unless you're ambidextrous or have problems with one of your hands, you'll probably have learned or will learn one base and stay with it.

For example, say you're like me and you're severely right-handed, you'll start with the hook in your right hand, and use your left hand to hold tension in the yarn.  This is usually called Right-Handed Crochet.

On the other hand (ha), you are dominantly left-handed, you'll do the opposite: you hold the hook in your left hand and the yarn in your right.  This is called Left-Hand Crochet.

If you don't favor one hand over the other much, you could pick and choose.  However, I would recommend that you go with the right hand.  Why?  Because almost all crochet patterns presume right-handed crochet. One of the consequences with choosing a base is that it determines which way you create the loops and therefore build the fabric.  With right-hand crochet, you work from right to left, and vice versa.  This has little overall consequence for the final product, or even what variations you use, but unless you're good with spacial thinking, left-handers may find it difficult to picture what's going on in the instructions or provided pictures.  That, and depending on the pattern writer, they may use 'left' instead of 'next stitch' or other similar phrases that assume right-handedness.  Left-handed crocheters have to watch out for that and mirror as needed.

Though, as you may suspect, handedness isn't the end all be all of it.  Since the non-dominate hand does the work of holding the yarn (and usually the work-in-progress), you may find that you prefer the hold the hook in your non-dominate hand instead so that the yarn is in your dominate hand.  Hand-ness is more important in crochet than, say, knitting, but it isn't everything many make it out to be.

Since to give real instructions means introducing some of the variations (after all you still need the way to hold the hook and yarn to start), I don't have any guides here, but here's a good list of myths associated with left-handed crochet.

Variations
So how do you hold the hook and hold tension in the yarn? Well, that's a lot more complicated.  There's a lot of variation, and it has little to do with the base or necessary technique usage and a lot about preference or what your teacher (both meatspace and not) used.  The only effect on the final product these variations have is personal to the crocheter...that is, you may find that one method produces neater stitches for you vs another.  Therefore, I won't make any broad recommendations as to which one to try first or learn.  You need to play around to find your best fit.

Holding the Hook
There are two official methods of holding a crochet hook: the knife method and the pencil method.  These are no way the only two variations in holding the hook, but they are what you'll run into if you learn from most sources, and I'd say the many of the variations are variations of these two methods.

The knife method, also called the overhand or over-the-hook method, is called that because you hold the crochet hook like you would a knife.  See the second set of pictures on this site and this site (also the third set there), and the first set on this site for slightly different variations on this method.  The key is that the shaft is under the palm of the hand with your thumb and some forefinger or set of forefingers on the grip.  While some sources will say to use your index finger and thumb, you can also use your middle finger and thumb, or all of them.  The other fingers aren't technically involved in the classic style of this method, but you may find yourself wrapping your pinky, ring finger, or both around the shaft of the hook (for stability and/or to help guide or move the hook).  Another connected variation is holding it 'fist like', like many of the commenters in the second link.  The hook can be facing you (see the first and third link), towards the floor (see second link), or the opposite of both of those (I guess, though I haven't see it).  However, hook position will be more of a consequence on how you hold the hook instead of a direct choice.  You may also turn the hook as you're crocheting.

The pencil method, also called the underhand or under-the-hook method, is also named after the common utensil in which the grip is similar.  See the first set of pictures in the first two links above, and the second in the third link for examples.  The key here is that the shaft is resting on or floating around the area between the thumb and forefinger, and only those two fingers are holding the crochet hook.  This method is a little less popular and so there seems to be less examples of variation to it, but it's possible.  For example, you can use your middle finger to grip instead of your pointer, and use the pointer to guide the hook (I tried it and found it easier that way than standard pencil grip, actually, but then again I'm weird and use my middle finger and thumb to grip all hooks and needles).

Holding the Yarn
On the other hand, there's no 'official' methods to hold the yarn, and the variations are endless.  However, there are right ways and wrong ways to do it.  This is because the way you hold the yarn has a direct effect on how tightly or loosely your stitches will come out (for the knitters out there, this doesn't hold as true for knitting due to how the stitches are produced, but that's a different topic).  Use the wrong hold, or the wrong one for you, and your stitches may be uneven, too loose, or too tight.

I say the wrong one for you because a right method that works for a million people may not work with your hand, especially since this is the non-dominate one we're most likely talking about.  Hands vary in size, shape, or strength, and that will have an effect on which method you prefer. For example, you might have cause two of your fingers to be stiff and prone to locking up because you rammed that hand into a bookcase years ago (ok, maybe that's just me). Things like that all can have an effect. The style you'll like may also change over time and incidents.  That's fine.  As long as you're getting good results, it doesn't matter.

One common way to hold the yarn is to wrap the yarn first around your pinky, and then over one of the other fingers (index, usually, but the middle can also be used) as a guide.  The fourth and fifth pictures down on this site shows this, as well as the first yarn hold method on this page (scroll past the hook holds).  Another variation is the second picture in this link.  The pinky wrap provides the tension, and the other finger is a guide to hold your yarn so that you can grab it with the hook. This method may give you a tighter tension than others, but it can also impede yarn flow as the yarn has to pull through the twist around the pinky finger.

Another is to pull the yarn between your pinky and ring finger, and then pull the yarn from under your fingers up and over your index (or middle) finger.  Grasping the yarn between the last two fingers provides the tension, and again, index or middle is your guide.  You can see this variation in the third picture of the first link in the last paragraph.  This way provides a looser tension, depending on how hard you grip the yarn with your last two fingers.  It may be too loose or you may find that you grip too hard to be conformable with this method.

A third is to hold the yarn with your last two or three fingers (bent towards the palm to hold it), and again, put it up over your index finger.  The third example in the third link above, and the second yarn hold method in the second link show this way.  This way is even looser in tension, if you need that.

There, are, of course, many other methods out there...way too many to list.  The last example on this link (same as the third above) is another, more unique way (the comments are sources for other variations and methods as well).  This link is a variation on the second one I listed that involves having the source of the yarn under the palm instead of over (makes more sense when you look at the picture).  This one shows the crochet just holding the yarn between the index and middle finger. 

If you really have no clue about which one to try, start with one of the three discussed above and modify from there (and if it's unconformable, then try another).  Don't get too frustrated at first, though.  Learning how to control tension in crochet takes some practice no matter what way you hold the yarn.

Conclusion
All in all, crochet methodology is fluid and you may have to experiment to find the way you like.  Have fun with it; after all, it's most likely your hobby.  Or will be, I hope.

March 14, 2013

In the Random Celebration Department

Happy Pi Day!

Hope you had some pie:

Ok, so it's the frozen kind.  It's still pie.
Mmm, blueberry pie...

In other news...naw, won't bore you with another got nothing post.  I have a real one planned, but I can't get it done tonight. It's in the works though!  I haven't given up yet!

But today, it's pie time.

March 3, 2013

Negative Yarn Craft

I got nothing of value at the moment, but two other things:

I made this simple seed stitch cowl last December, out of a random ball of royal blue alpaca I picked up:


It didn't take me too long (I don't think I ever mentioned making it here), and despite my not-love for cowls, I started wearing it all the time.  Since I wear it all the time, I went out last Friday with it...and promptly managed to misplace it in a bar. When I got to the bar, I know I put it with my coat, and I thought I stuffed it in my coat sleeve, but it wasn't there or anywhere nearby when I went to move the coat, oh I don't know, maybe forty minutes later.

I think this is the first time I've managed to lose on of my projects.  Well, at least ones that weren't crappy that I didn't care about. And it's not like it'll be hard to make another.  I just got to go spend $15 on another skein and re-do it.  But it wasn't in my plans, and I'm pissed off at myself, but what else is new?

The second is that I'm cheating on my yarn.  Oh, don't get me wrong, I've been knitting.  I finished the fingerless gloves I was working on a bit ago:


And I've been steadly working on my simple top-down raglan sweater (mostly on my morning commute, as I always get a seat on the subway then):


But that's not what I've been spending most of my time working on.  I'm sewing instead.  Despite the fact that I barely know how to sew and, oh yeah, don't own a sewing machine nor have the room or desire to get one. Because I'm ambivalent at best about sewing or any craft involving using a straight needle and tiny thread, and this isn't a long term new craft for me.

This seems out of the blue, but I've been planning this project for awhile now.  I'm hoping to go to a couple of SCA events this year, and I need better garb. However, any garb on the internet is either the same mass-produced inauthentic stuff (and I have enough of that) or really expensive for even the simplest of things (which I understand, but still).  Or actually, make that 'and really expensive (which I understand for the authentic stuff but otherwise, no, rip-off)'.  It came down to either spending hundreds of dollars on basic garb or making it myself for half that.  Given that currently I'm not a member and am only planning to do two weekend events...yeah.  I'm already going to be investing too much money in it because it is a big money sink (more than yarn craft), and that's even given the fact that I bum space in my sister's tent and camping supplies from my family.

To bring it back to yarn craft, I feel like the whole falling in head first with the knitting and crochet in the last couple of years has made me infinitely more patient at making stuff (well, may also just be me getting older, but whatever).  Four or five years ago I wouldn't be able to spend two months working on a sweater, no matter how much I liked the idea.  I just did that.  Of course, there's a limit, but the whole garb issue now falls on the 'screw it, I'll learn to make it' side.

So that's what I'm doing instead of blogging.  Maybe next week I'll get this thing back on topic.  Maybe.